RF Choke Coil (Made Easy)
I have received many emails asking about my homebrew RF Choke coils under my antennas in the antenna photos. So it seems appropriate to do an article about these simple little wonders.
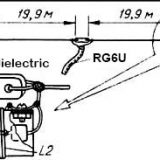
I was looking on the internet about different kinds of choke coils, and I came across this photo…
I looked at this photo for a while and I had to laugh.
Don’t misunderstand my laughter. The coil in this photo will work just fine. There is nothing wrong with the design or construction of it. But you don’t have to go through all of that trouble to build it.

The truth is, the wrapped up extra coax to the bottom right of the pic would probably do the same and equally effective job as the perfectly wound coax on the PVC tubing. Believe it or not, it’s true.
Well…. actually the extra coax should be tightened up into more of a donut shape. Then it would work as well as the coax on the PVC tube would.

All of those charts and numbers make it sound so important to build it to their exact specifications or you will fail. But they are not important. All of those charts and calculations were made to make the author feel important and look like a real smart guy. Again, don’t take my comments the wrong way. Most of those designs will work just fine. I am not calling them liars. I am only saying that those designs are overblown and do not have to be so complicated to work just as well.
The main purpose of an RF choke is very simple. It is used to prevent stray RF from traveling back down the surface of the coax shield conductor, and into the shack and your equipment. This problem can cause all kinds of troubles in the radio room. It can raise SWR a little, it can cause RF burns when you touch 2 pieces of equipment at the same time, it can let stray RF get into every electronic device in your home and cause interference, it can cause RF feedback which is what causes hum and squealing in your audio…..the list goes on. It is safe to say that you don’t want RF from the antenna getting into your home. There is one very simple way to stop it in it’s tracks at the antenna where it belongs. And it doesn’t take a degree in engineering to figure it out.
The RF Choke Coil Solution
Here is the very simple way to make an RF choke coil that will remove your RF feedback troubles. You will be using the same piece of coax that is used for the feedline. In other words, do not make a choke coil, then splice it in later with PL-259’s and couplers. This will lower the effectiveness of the choke. The choke and the feed coax should all be one uncut piece so the choke is a part of the feedline.
Put your PL-259 on the end of the coax that connects to the antenna. Measure down from the connector about 18 to 24 inches maximum. Do not go any longer than 24 inches. If you go longer than 2 feet, the RF has a much longer piece of coax to travel down to get to the choke, and all of that coax with RF on the surface starts to act like the antenna, and emits RF by it self.
At the 18 to 24 inch mark, begin wrapping the coax in loops as if you are winding it up for storage. Now here is the really big difficult technical part, so please be careful. (That was a joke. Like I said, this isn’t rocket science. So chill out.)
Make between 6 to 10 loops of the coax. Wrap them close together so that the inside measurement of the loops are between 6 to 10 inches across the donut hole. This part is important to remember. You DO NOT have to make each loop side by side in a perfect order. Any of the loops can overlap next to, under, or over the other loops. Similar to the wrapped up extra coax in the first photo above. Except you want each loop to be close together like a fat donut. You get the idea. Doing this will have no change in how effective the choke is. Wrapping the loops side by side or overlapping is not what makes the choke work. It will still do it’s job perfectly. I will explain this in a while.
Even though you can make 6 to 10 loops at 6 to 10 inches across the hole, I always go by the 8-8 rule. That means you make 8 loops that are 8 inches across the inside of the donut hole. There is no significance to the 8-8 rule other than it is easy for me to remember and they work great for me. Remember, overlapping is fine. Once again, this is not rocket science. Once you have the loops made and they are about 8 inches across the donut hole, use heavy duty plastic (Not metal) wire ties in 3 or 4 places around the choke to hold it tightly together. It doesn’t hurt to make a few loops of electrical tape just in case the ties ever break. I wrap 2 inch wide electrical tape right over the wire ties just for that extra added confidence. You should now have a nice tightly wound choke with about 18 to 24 inches of coax off one side terminated with a PL-259 connector. Off the other side is the rest of the coax that will go to the radio.





Just found your blog on EHam.com. Great reading on all subjects. Thanks for the info Regards and best wishes . Bob N9RMA
Been trying to find a good way to understand RF chokes for a little while now … read a LOT of web pages … your explanation was by far THE best. You found the right words for me to finally have a crystal clear mental picture of what’s happening. No BS fancy words or graphs… etc, straight to the point.
If you measure down 18 to 24 inches on a 1/4 wave ground plane cb antenna with radials angled down at about 45° the choke will be between the radials. Is that ok? Will it interfere with the normal operation of the antenna? Thanks.
It won’t necessarily interfere with the normal operation of the antenna but you’d be better off adding the choke at the 1/4 wave point down the coax.
This might allow the coax braid to radiate like part of the counterpoise radials, but only for the first 1/4 wave.
However, if you add a choke within the field of the radials, there’s a possibility the braid could capture and carry RF down it’s braid and into your shack, possibly causing local sympathetic radiation interference and/or RF in the audio or equipment.
I use receiving only magnetic loop antenna. Does it need a RF chock to remove the stray RF signal ?
Clear, concise and fun to read. Thank you for the advice.